Building a carpool web API with Django (part 4)
In part 3 of our series we added more models to our system. In this post we are going to start working on the REST API. We are going to install the library that we will use as well as serialize our User model, create a ViewSet for it and add some permissions to it. It is going to be a very short post at the end of which we will have our first REST endpoint for our API.
We are going to use Django REST Framework which is the most popular toolkit for building web APIs with Django. It allows us to build a browsable API which I personally think is very cool. Let’s install the library by running the command below – remember to first activate your virtual environment by running pipenv shell:
pipenv install djangorestframework==3.10.2
Add it to INSTALLED_APPS:
# kapool_project/settings.py
INSTALLED_APPS = [
    # ...
    'rest_framework', # new
]
Now let’s configure our REST frame work by adding default permission classes:
# kapool_project/settings.py
REST_FRAMEWORK = {
    'DEFAULT_PERMISSION_CLASSES': [
        'rest_framework.permissions.DjangoModelPermissionsOrAnonReadOnly'
    ]
}
The default permission class we have added (DjangoModelPermissionsOrAnonReadOnly) will grant read-only access to unauthenticated users.
Authentication views
Since we want our API to be browsable we need to add REST framework’s authentication views to enable us to login and logout. Go to kapool_project/urls.py and add the following to your urlpatterns list:
# kapool_project/urls.py
urlpatterns = [
    # ...
    path('api-auth/', include('rest_framework.urls', namespace='rest_framework')), # new
]
User serializer
Now we are going to create a serializer for our User model. Serializers are used to convert complex data such as querysets and model instances to navite Python datatypes that can be rendered into JSON, XML or other content types. For more information about serializers visit the official site. We want our API to use JSON content type so we need to create serializers for our models. Inside the users/ directory create serializers.py and add the following:
# users/serializers.py
from datetime import date
from dateutil.relativedelta import relativedelta
from django.contrib.auth import get_user_model
from rest_framework import serializers
from django.contrib.auth.models import User


class UserSerializer(serializers.HyperlinkedModelSerializer):

    def validate_birth_date(self, value):
        """
        Validates `birth_date`.
        """
        if value:
            if value > date.today():
                raise serializers.ValidationError(
                    'Birth date cannot be in the future'
                )
            age = relativedelta(date.today(), value).years
            if age < 18:
                raise serializers.ValidationError(
                    'User should be 18 years or older'
                )
        return value

    class Meta:
        model = get_user_model()
        fields = [
            'username',
            'email',
            'first_name',
            'last_name',
            'gender',
            'birth_date',
            'url',
        ]
User ViewSet
We are going to create a ViewSet for our User model. ViewSets are classes that provide you will all the CRUD actions for a given model. Go to users/views.py and create the UserViewSet:
# users/views.py
from django.contrib.auth import get_user_model
from rest_framework import viewsets, mixins

from .serializers import UserSerializer

User = get_user_model()


class UserViewSet(
        mixins.ListModelMixin,
        mixins.RetrieveModelMixin,
        mixins.UpdateModelMixin,
        viewsets.GenericViewSet):

    queryset = User.objects.all()
    serializer_class = UserSerializer
Putting everything together
Now that we have a serializer and a ViewSet for our model. Let’s create an endpoint through which we can access it. We do this by registering our ViewSet to a router. Inside kapool_project/ create api.py and add the following:
# kapool_project/api.py
from rest_framework import routers
from users.views import UserViewSet

router = routers.DefaultRouter()
router.register('users', UserViewSet)
Now let’s go to kapool_project/urls.py and register our API router:
# kapool_project/urls.py
# ...
from .api import router # new


urlpatterns = [
    # ...
    path('api/v1/', include(router.urls)), # new
]
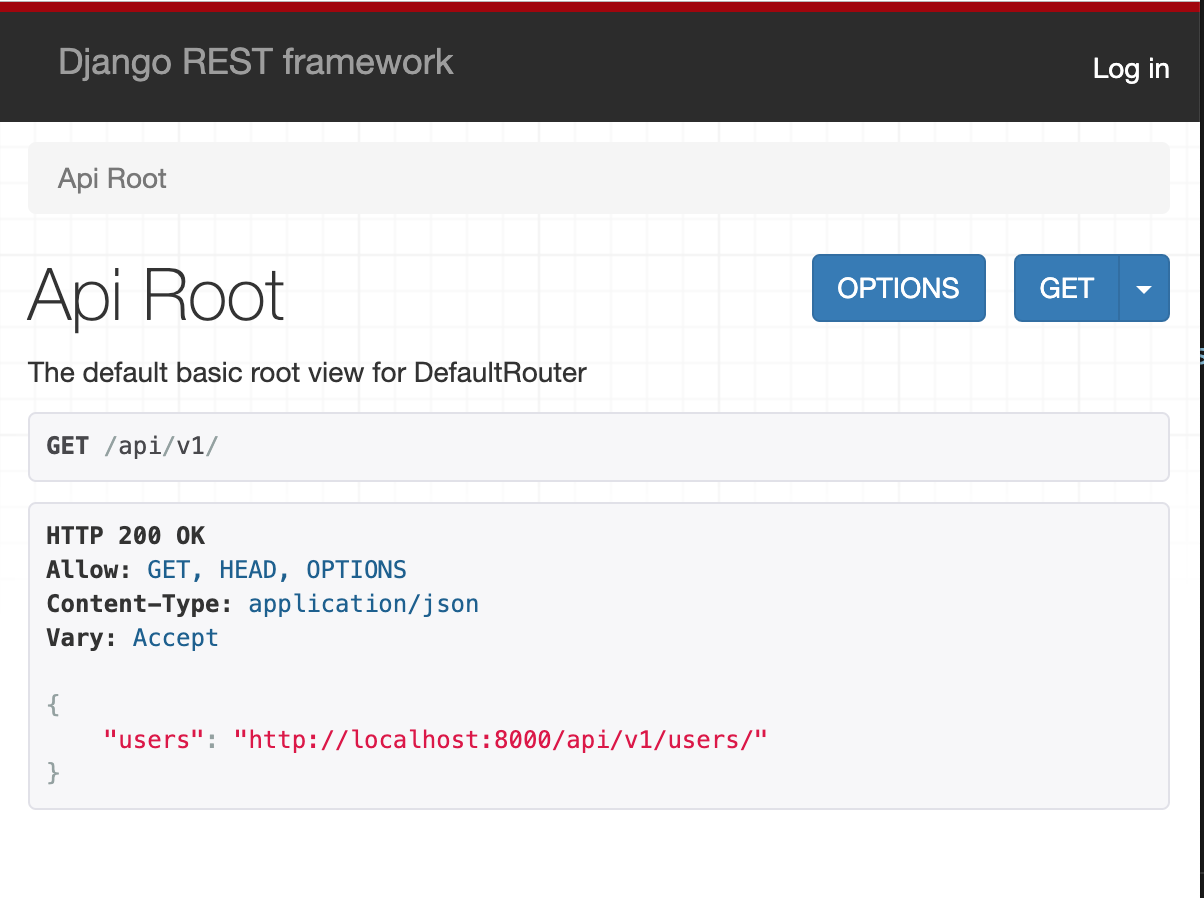
Run your server (python manage.py runserver) and go to http://localhost:8000/api/v1/. You will see the API root that gives you a list of all end points in your API.

We have successfully created a browsable web API! You may navigate to the users endpoint to list and edit your users. Since we added urls to the authentication authentication views you may also login to the API.
Permissions
As you may have noticed, any authenticated user can update details of any user in our API. This obviously is not very good so we need to address that by adding permissions to our user ViewSet. Django REST framework comes with some permissions that we may use but in most cases we have to create our own permissions that fit our needs. Inside users/ create permissions.py and add the following:
# users/permissions.py
from rest_framework import permissions


class IsAuthenticatedUserOrReadOnly(permissions.BasePermission):
    """
    Object-level permission that allows users to edit only their own profiles.
    """

    def has_object_permission(self, request, view, obj):
        if request.method in permissions.SAFE_METHODS:
            return True
        return obj == request.user
The custom permission above only gives write access to a user if they are viewing their own profile. Now let’s add our permission to the UserViewSet:
# users/views.py
from django.contrib.auth import get_user_model
from rest_framework import viewsets, mixins

from .serializers import UserSerializer
from .permissions import IsAuthenticatedUserOrReadOnly # new


User = get_user_model()


class UserViewSet(
        mixins.ListModelMixin,
        mixins.RetrieveModelMixin,
        mixins.UpdateModelMixin,
        viewsets.GenericViewSet):

    queryset = User.objects.all()
    serializer_class = UserSerializer

    permission_classes = [
        IsAuthenticatedUserOrReadOnly,
    ] # new
Now if you go to your users endpoint you will see that you cannot update other users’ profile except yours which is what we wanted.
What did we do?
In this post we added Django REST framework to our project. We also created a serializer and ViewSet for our User model which we then registered to our API router. Finally we added a custom permission to our UserViewSet that allows users to only have write access to their own profiles. In the next posts we are going to add more endpoints to our REST API. Thanks once again for reading.
You may view the full source code on GitHub.
Comments