
In the previous post we introduced Azure AD B2C, a scalable customer identity and access management (CIAM) solution that helps businesses manage customer identity for their client-facing applications. In this post we are going to create our B2C tenant and create user journeys to sign in, sign up, edit profiles and reseting password using custom policies. We are going to have a simple case study that we will use to add certain features to our user journeys. Each subsequent post will add new requirements to the case study.
Case Study
Hones Bakery is a growing bakery based in Midrand, South Africa providing delicious cakes and other product. The business has been growing steadily over the past couple of years and now the owner wants to allow her customers to sign in to the website where they can place orders and manage their profiles. We have decided that building our own CIAM solution is not the way to go so we are going to use Azure AD B2C for this. In this post we are going to create a tenant for Hones Bakery and set up the custom policies we are going to use to create our user journeys. Let’s get started.
Create Tenant
Like we said in the previous post an Azure AD B2C tenant is the bedrock of everything B2C. Before we go any further we need to create a tenant for your business. We are not going to outline the steps in this post for brevity. Instead, you may follow the steps outlined in this tutorial. Our tenant name will be honesbakery with a domain name honesbakery.onmicrosoft.com. You can’t use the same name since tenant names need to be globally unique so you’ll have to choose another name for your tenant. Once you have created your tenant we can move on to setting up our custom policies.
Create Custom Policies
Azure AD B2C provides two methods to define how your users will interact with your applications. The first one is user flows which are predefined and can be quickly set up on the portal. You may use user flows if you don’t have complex user journeys and all you need is just basic sign in, sign up etcetera. As soon as you have a more complex user journey such as adding progressive profiling, reCaptcha, making REST calls to some of your internal systems, you will have to make use of custom policies. Custom policies are configuration files written in XML (yes, XML ![]() ) that define the behavior of your tenant. I really do not want to repeat what’s in the documentation so I strongly advise that you read the documentation to get more understanding of what custom policies are as well as certain terms you need to know. Now let’s go ahead and setup our tenant to use custom policies.
) that define the behavior of your tenant. I really do not want to repeat what’s in the documentation so I strongly advise that you read the documentation to get more understanding of what custom policies are as well as certain terms you need to know. Now let’s go ahead and setup our tenant to use custom policies.
There are certain steps you need to follow in order for you to get your custom policies up and running. These include registering the IdentityExperienceFramework and the ProxyIdentityExperienceFramework applications and creating signing and encryption keys. All this is well documented in the documentation so no need to repeat. There is however a faster way of getting your custom policies up and running that won’t require too much input from you. Some clever people out there created an online tool that automates all the steps provided in the documentation and you can find it here. I highly recommend that you make use of this tool as it eliminates errors and by the time it’s finished the set up, you will have custom policies deployed to your tenant.
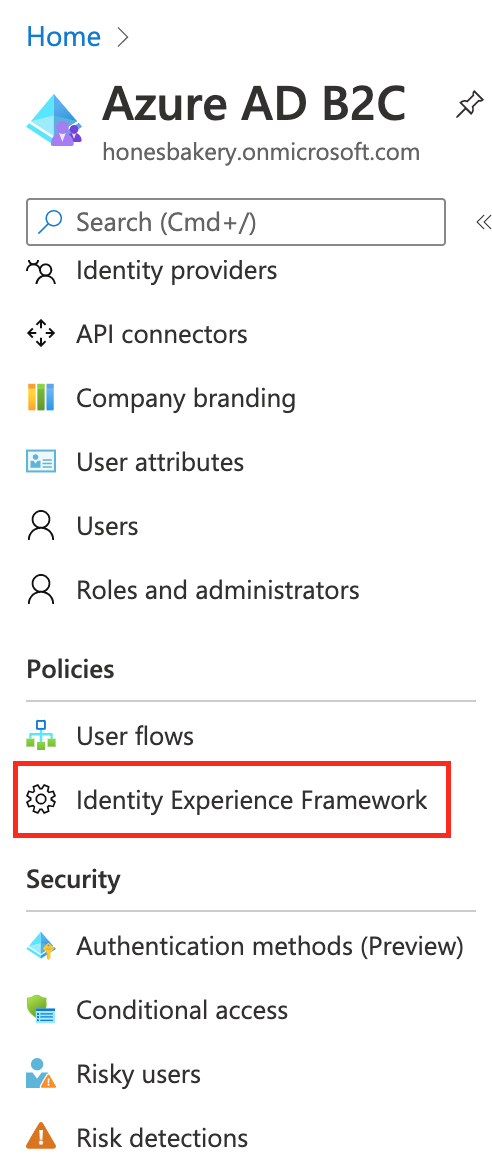
Once the tool has completed the setup you can go to your Azure AD B2C tenant and select the Identity Experience Framework menu item (see Figure 1 below) and you will see a list of policy files uploaded.
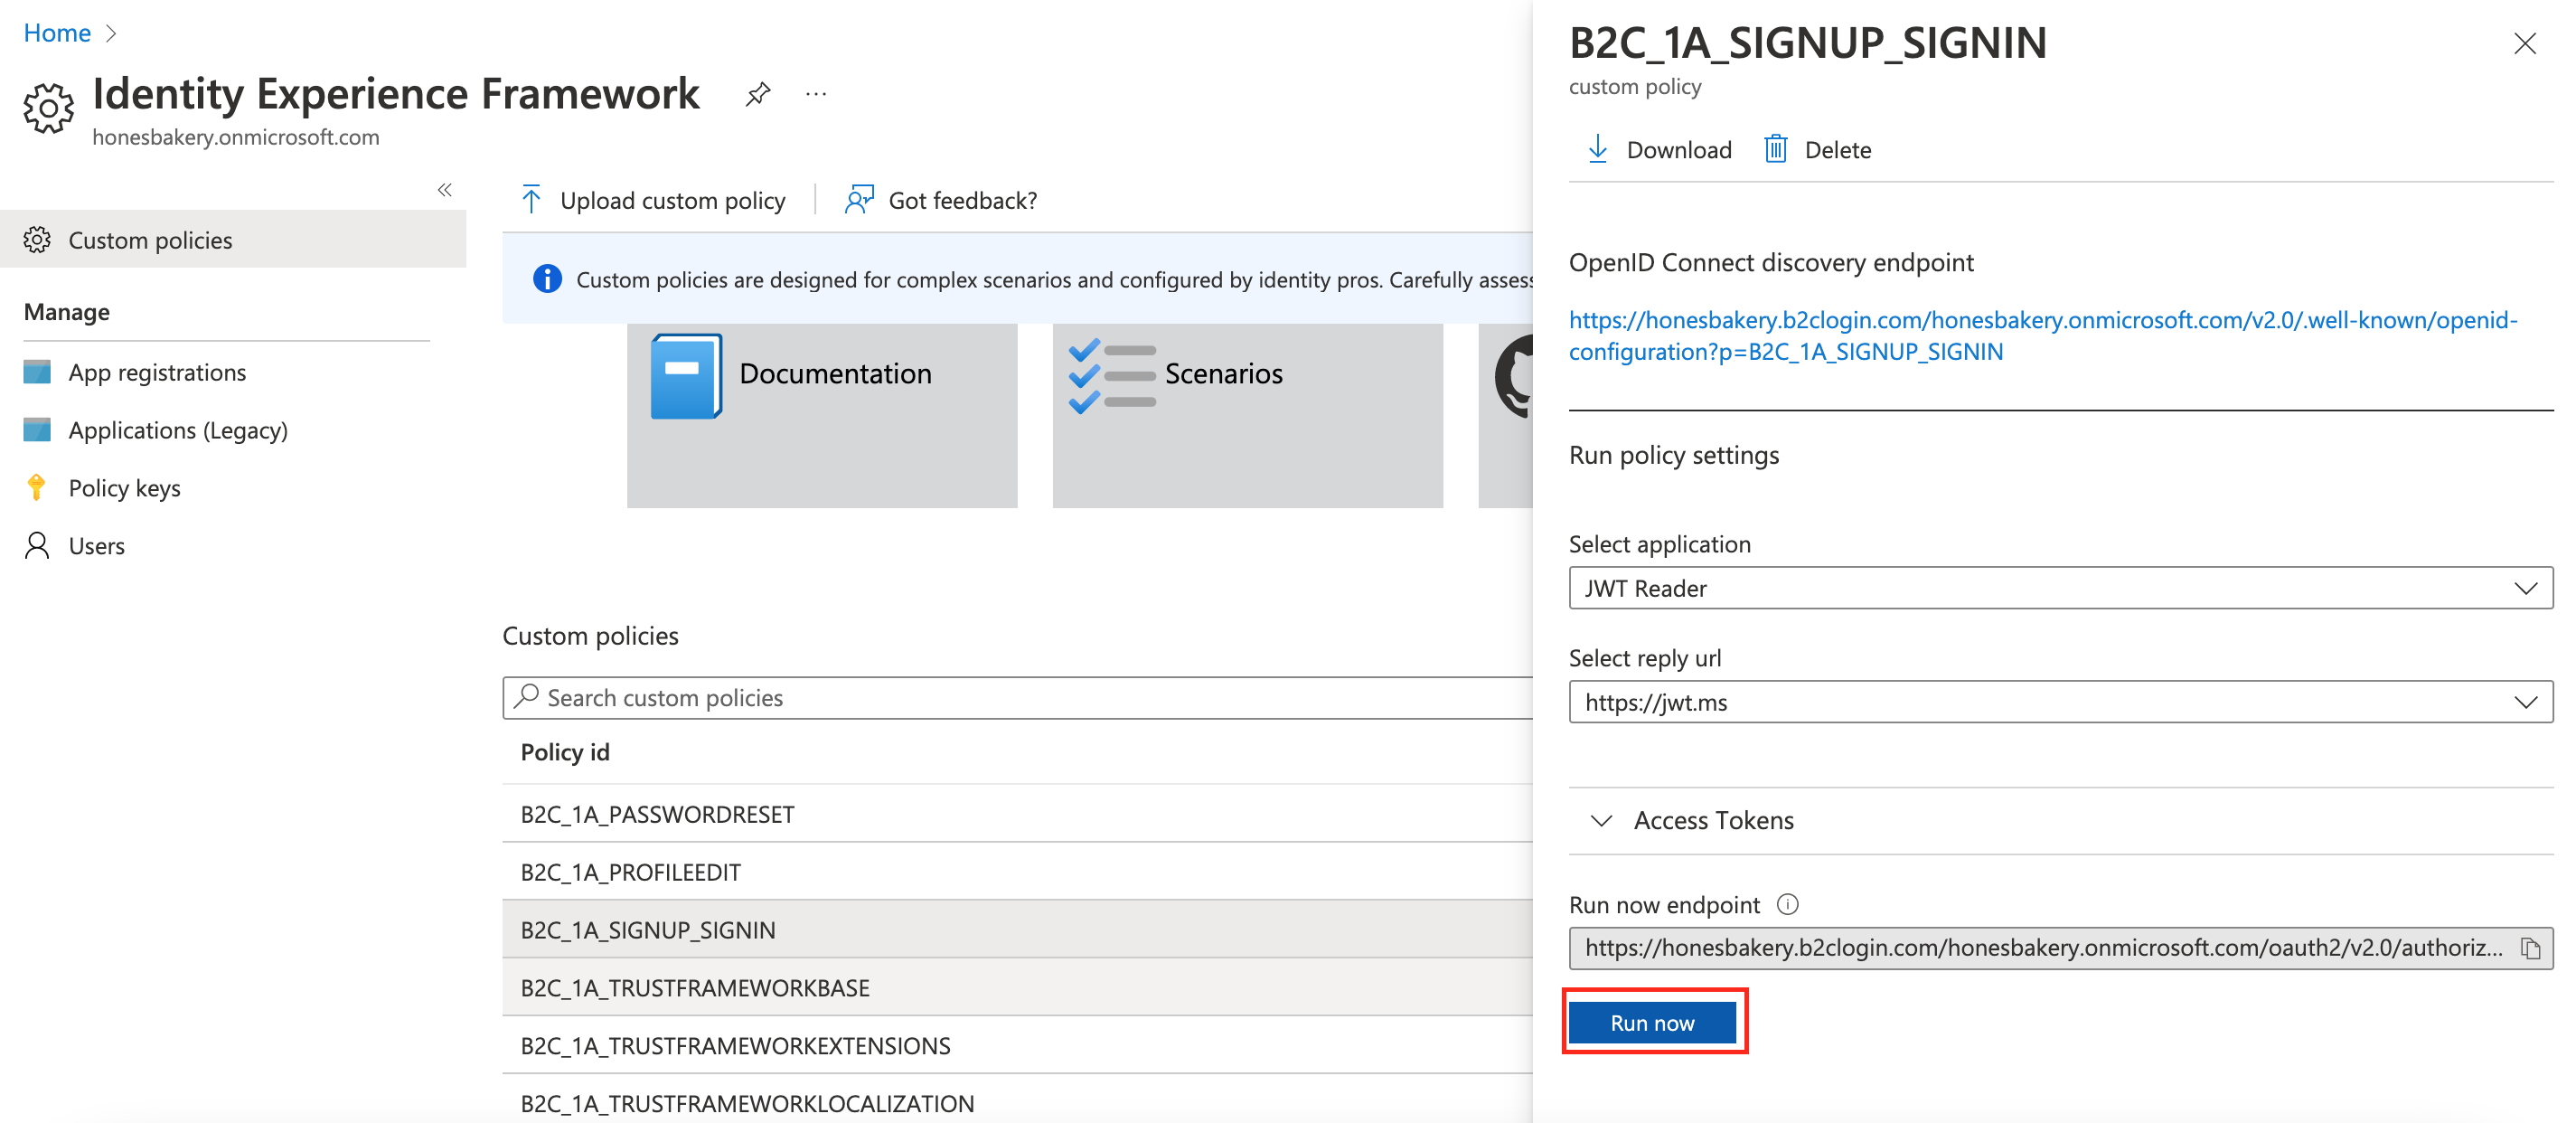
Azure AD B2C allows you to quickly test your policies. Select the sign in/up policy and select the Run now button (see Figure 2 below). This will take you to the sign in page where, upon completion, you will be redirected to the jwt.ms page where you can quickly check the claims in the issued token. We are going be making extensive use of this feature as we add more features to our custom policies.
Download all the policy files in the list to your local machine. We are going to make updates to them in subsequent posts as we look to enhance the user journeys to meet the requirements of our business. These are the policy files that you should have:
-
TrustFrameworkBase.xml: This is the base file that contains all the base configurations. There should be few changes made to this file. This will help with troubleshooting and maintainability of your policies. -
TrustFrameworkLocalization.xml: This is where localization changes are made. It is derived from theTrustFrameworkBase.xmlfile. -
TrustFrameworkExtensions.xml: This where the unique configuration changes for your tenant should be made. You use this file to add new functionality or override existing functionality (see next post). It is derived from theTrustFrameworkLocalization.xmlfile. - Relying party files: These are single task-focused files that are invoked directly by the applications. These files include
SignUpOrSignin.xml,ProfileEdit.xmlandPasswordReset.xml. If an application wants to start the sign up/in flow, it will call theSignUpOrSignin.xmlrelying party policy.
Please check out the documentation if you want to learn more about the inheritance model in custom policies.
Setup Your Environment
Now that you have downloaded our custom policies your local machine you need to set up Visual Studio Code (the recommended IDE). If don’t have VS Code on your machine you may download it here and install it. After you have installed VS Code you then need to install the Azure AD B2C extension to your IDE. This extension will help easily navigate through your custom policies which simplifies life considerable. Figure 3 below shows how you VS Code will look like once you have installed the extension to VS Code. The extension adds Azure AD B2C policy explorer where you will be able to quickly navigate your policies. As you can see in the image below, you can expand things like user journeys, technical profiles etc. The extension also allows you to view application insights trace logs if you have it set up. We are going to look at adding monitoring to your custom policies in a future post.

Conclusion
In this post we created a Azure AD B2C tenant as well as set up custom policies for your business. In the next post we are going to add custom claims and progressive profile updates to our custom policies. Thanks so much for taking your time to read and please leave a comment if you have any question, suggestion or correction you want to make.
Comments