Biometric Authentication In Flutter
Nowadays almost all mobile devices support biometric authentication to add a ‘fool-proof’ solution for user verification. If your Flutter app contains sensitive user information you may need to consider adding biometric authentication. In this post I am going to show you how you can integrate biometric authentication into your Flutter application. Let’s get started. Please note that I will not show all the code in this post for brevity. You can get the complete source code from GitHub.
Install Packages
Create a Flutter application and add the following packages to your pubsec.yaml file and then run flutter pub get:
# pubsec.yaml

dependencies:
  #...
  local_auth: ^1.1.0
  get: ^4.1.1
  equatable: ^2.0.0
Don’t worry much about get and equatable packages. The star of the show is the local_auth plugin. This plugin allows us to add local biometric authentication to our Flutter app. Now that we have all the packages let’s set up our Android and iOS projects.
iOS Setup
The local_auth plugin supports both TouchID and FaceID on iOS devices. However, if you want to use FaceID then you need to add the following in the Info.plist file:
<!-- ios/Runner/Info.plist-->

<key>NSFaceIDUsageDescription</key>
<string>[REASON_FOR_USING_FACEID_HERE]</string>
That is all the setup you need for iOS.
Android Setup
First, we need to go and add a permission that will allow us to use fingerprint authentication. Go to your AndroidManifest.xml and add the following:
<!--android/app/src/main/AndroidManifest.xml-->

<uses-permission android:name="android.permission.USE_FINGERPRINT"/>
The local_auth plugin requires the use of FragmentActivity instead of Activity. Go to your MainActivity class and make it extend FragmentActivity:
// android/app/src/main/kotlin/com/example/app/MainActivity.kt

package com.example.app

import io.flutter.embedding.android.FlutterFragmentActivity

class MainActivity: FlutterFragmentActivity() {
}
That is all the setup we need so now we can start writing some code.
Auth Controller
We are going to add a GetX controller that we will use to handle our authentication. Create a file auth_controller.dart and add the following code:
// lib/features/auth/auth_controller.dart

import 'package:flutter/services.dart';
import 'package:get/get.dart';
import 'package:local_auth/local_auth.dart';

import 'auth_state.dart';

class AuthController extends GetxController {
  final _localAuth = LocalAuthentication();
  final _authenticationStateStream = AuthenticationState().obs;
  final _biometricSupportedStream = false.obs;

  AuthenticationState get authState => _authenticationStateStream.value;
  bool get isBiometricsSupported => _biometricSupportedStream.value;

  @override
  void onInit() {
    _checkIfBiometricsSupported();
    _authenticationStateStream.value = UnAuthenticated();
    super.onInit();
  }

  Future<void> signInWithBiometrics() async {
    try {
      var isAuthenticated = await _localAuth.authenticate(
          localizedReason: 'Authenticate with your biometrics',
          useErrorDialogs: true,
          stickyAuth: true,
          biometricOnly: true);
      if (isAuthenticated) {
        _authenticationStateStream.value = Authenticated();
      } else {
        _authenticationStateStream.value = UnAuthenticated();
      }
    } on PlatformException catch (e) {
      // display this error if you want
      print(e.message);
    }
  }

  void signOut() {
    _authenticationStateStream.value = UnAuthenticated();
  }

  void _checkIfBiometricsSupported() async {
    _biometricSupportedStream.value = await _localAuth.isDeviceSupported();
  }
}
In the onInit() method we are calling _checkIfBiometricSupported() which confirms if the device is capable of checking biometrics or is able to fail over to device credentials. You can use the value from this call in your UI to decide whether or not to show the option to use biometrics. The signInWithBiometrics() is self-explanatory I think. It uses the local_auth plugin to authenticate the user using their biometrics.
Now that the controller is done we can add the login page which is just a basic widget:
// lib/features/auth/auth_page.dart

import 'package:app/features/auth/auth.dart';
import 'package:flutter/material.dart';
import 'package:get/get.dart';

class AuthPage extends GetWidget<AuthController> {
  @override
  Widget build(BuildContext context) {
    return Scaffold(
      appBar: AppBar(
        title: Text('Sign in'),
      ),
      body: SafeArea(
        minimum: EdgeInsets.all(16),
        child: Column(
          crossAxisAlignment: CrossAxisAlignment.stretch,
          mainAxisAlignment: MainAxisAlignment.center,
          children: [
            FlutterLogo(
              size: 150,
            ),
            Text(
              'Welcome',
              style: Get.textTheme.headline4,
              textAlign: TextAlign.center,
            ),
            SizedBox(
              height: 16,
            ),
            _getLoginButton()
          ],
        ),
      ),
    );
  }

  Widget _getLoginButton() {
    return Obx(() {
      if (controller.isBiometricsSupported) {
        return ElevatedButton(
          onPressed: () {
            controller.signInWithBiometrics();
          },
          child: Text('Login with biometrics'),
        );
      } else {
        return Text(
          'Oops, device does not support biometrics',
          style: Get.textTheme.bodyText1.copyWith(color: Get.theme.errorColor),
        );
      }
    });
  }
}
And to put everything together, go to your main.dart and add the following code:
// lib/main.dart

import 'package:app/features/features.dart';
import 'package:flutter/material.dart';
import 'package:get/get.dart';

void main() {
  initialize();
  runApp(MyApp());
}

void initialize() {
  Get.lazyPut(() => AuthController());
}

class MyApp extends GetWidget<AuthController> {
  @override
  Widget build(BuildContext context) {
    return GetMaterialApp(
      title: 'Biometric Auth',
      theme: ThemeData(
          primarySwatch: Colors.blue,
          visualDensity: VisualDensity.adaptivePlatformDensity),
      debugShowCheckedModeBanner: false,
      home: Obx(() {
        if (controller.authState is UnAuthenticated) {
          return AuthPage();
        }else {
          return HomePage();
        }
      }),
    );
  }
}
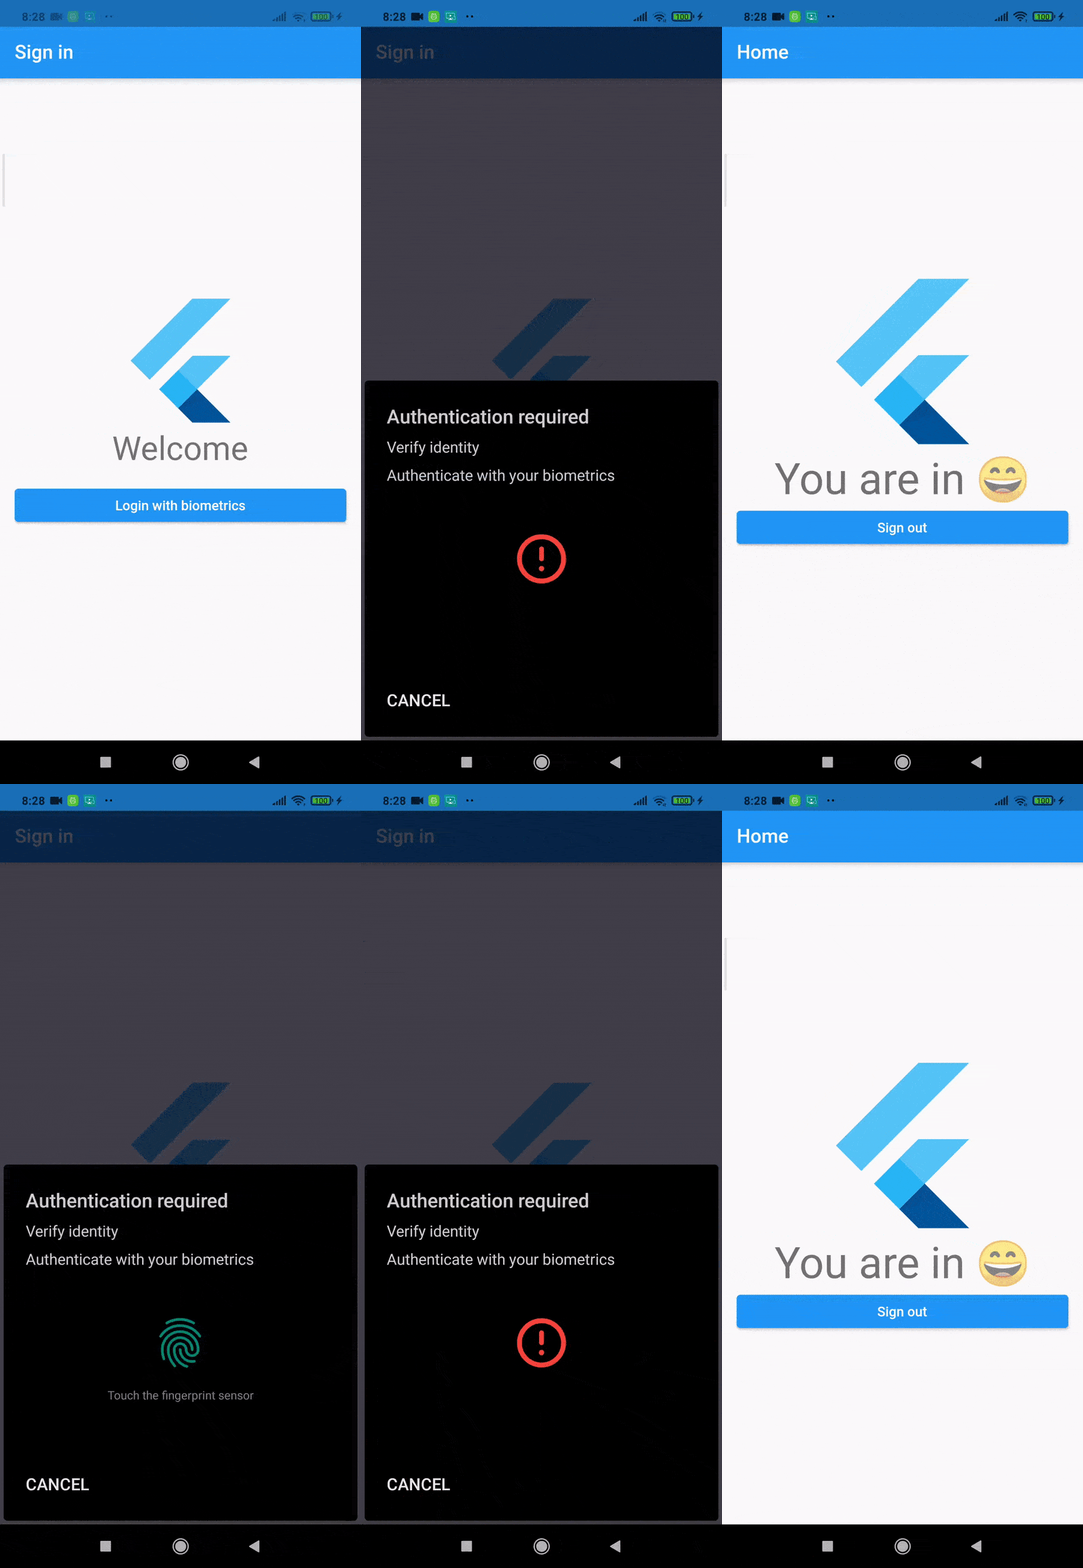
We are done and here is the end result:

Conclusion
In this post I showed how you can use the local_auth plugin to add biometric authentication to your Flutter app. The source code for this post is available on GitHub if you want to check it out. Thank you so much for taking your time to read and hopefully you have learned something.
Comments