
Working With Forms In Flutter
When developing mobile apps it is almost inevitable that you will want to capture some information from the user using forms. In this post we are going to talk about building and validating forms in Flutter. This is going to be a very short read. We are going to build a simple login form that has some validation. Let’s get started.
Simple Login Form
Create a new Flutter app and add a pages directory inside your lib directory. Inside the pages directory add a new file login_page.dart and add the following code:
import 'package:flutter/material.dart';

class LoginPage extends StatefulWidget {
  @override
  _LoginPageState createState() => _LoginPageState();
}

class _LoginPageState extends State<LoginPage> {

  final GlobalKey<FormState> _key = GlobalKey<FormState>();
  bool _obscurePassword;
  bool _autovalidate;
  TextEditingController _emailController;
  TextEditingController _passwordController;

  @override
  void initState() {
    super.initState();
    _obscurePassword = true;
    _autovalidate = false;
    _emailController = TextEditingController();
    _passwordController = TextEditingController();
  }

  @override
  Widget build(BuildContext context) {
    return Scaffold(
      appBar: AppBar(
        title: Text('Login'),
      ),
      body: SafeArea(
        minimum: const EdgeInsets.all(16),
        child: _buildLoginForm(),
      ),
    );
  }

  Widget _buildLoginForm() {
    return Form(
      key: _key,
      autovalidate: _autovalidate,
      child: SingleChildScrollView(
        child: Column(
          crossAxisAlignment: CrossAxisAlignment.stretch,
          children: <Widget>[
            TextFormField(
              decoration: InputDecoration(
                labelText: 'Email',
                filled: true,
                isDense: true,
              ),
              controller: _emailController,
              keyboardType: TextInputType.emailAddress,
              autocorrect: false,
              validator: _validateEmail,
            ),
            SizedBox(
              height: 12,
            ),
            TextFormField(
              decoration: InputDecoration(
                labelText: 'Password',
                filled: true,
                isDense: true,
              ),
              obscureText: _obscurePassword,
              controller: _passwordController,
              validator: (val) => _validateRequired(val, 'Password'),
            ),
            const SizedBox(
              height: 16,
            ),
            RaisedButton(
                color: Theme.of(context).primaryColor,
                textColor: Colors.white,
                padding: const EdgeInsets.all(16),
                shape: new RoundedRectangleBorder(borderRadius: new BorderRadius.circular(8.0)),
                child: Text('LOGIN'),
                onPressed: _validateFormAndLogin),
          ],
        ),
      ),
    );
  }

  String _validateRequired(String val, fieldName) {
    if (val == null || val == '') {
      return '$fieldName is required';
    }
    return null;
  }

  String _validateEmail(String value) {
    if (value == null || value == '') {
      return 'Email is required';
    }
    Pattern pattern =
        r'^(([^<>()[\]\\.,;:\s@\"]+(\.[^<>()[\]\\.,;:\s@\"]+)*)|(\".+\"))@((\[[0-9]{1,3}\.[0-9]{1,3}\.[0-9]{1,3}\.[0-9]{1,3}\])|(([a-zA-Z\-0-9]+\.)+[a-zA-Z]{2,}))$';
    RegExp regex = new RegExp(pattern);

    if (!regex.hasMatch(value)) {
      return 'Enter valid email address';
    }
    return null;
  }

  void _validateFormAndLogin() {
    // Get form state from the global key
    var formState = _key.currentState;

    // check if form is valid
    if (formState.validate()) {
      print('Form is valid');
    } else {
      // show validation errors
      // setState forces our [State] to rebuild
      setState(() {
        _autovalidate = true;
      });
    }
  }
}
As you may have noticed, we have a GlobalKey property that we created and added to our form. We use it to get access to our form’s state so that we may validate it. For more information on global keys visit the docs.
We are using the TextFormField widget for our input fields. This is a convinience widget that wraps a TextField widget in a FormField widget. It provides a validator that we can use to validate the contents of the field. In our example we have two validators – _validateRequired which ensures that required fields are filled in and _validateEmail which validates email addresses.
The Form widgets has autovalidate property which, if set to true will validate the form as the user is inputing. In our case we initially set it to false and then when the user presses the login button and the form is not valid, we call setState() and change it to true so the user can see the validation errors, if there are any. This provides a good user experience instead of starting off showing validation errors before the user enters anything.
Let us now go to our main.dart file and add the following code:
import 'package:flutter/material.dart';
import 'pages/login_page.dart';

void main() => runApp(MyApp());

class MyApp extends StatelessWidget {
  @override
  Widget build(BuildContext context) {
    return MaterialApp(
      title: 'Forms Demo',
      debugShowCheckedModeBanner: false,
      theme: ThemeData(
        primarySwatch: Colors.blue,
      ),
      home: LoginPage(),
    );
  }
}
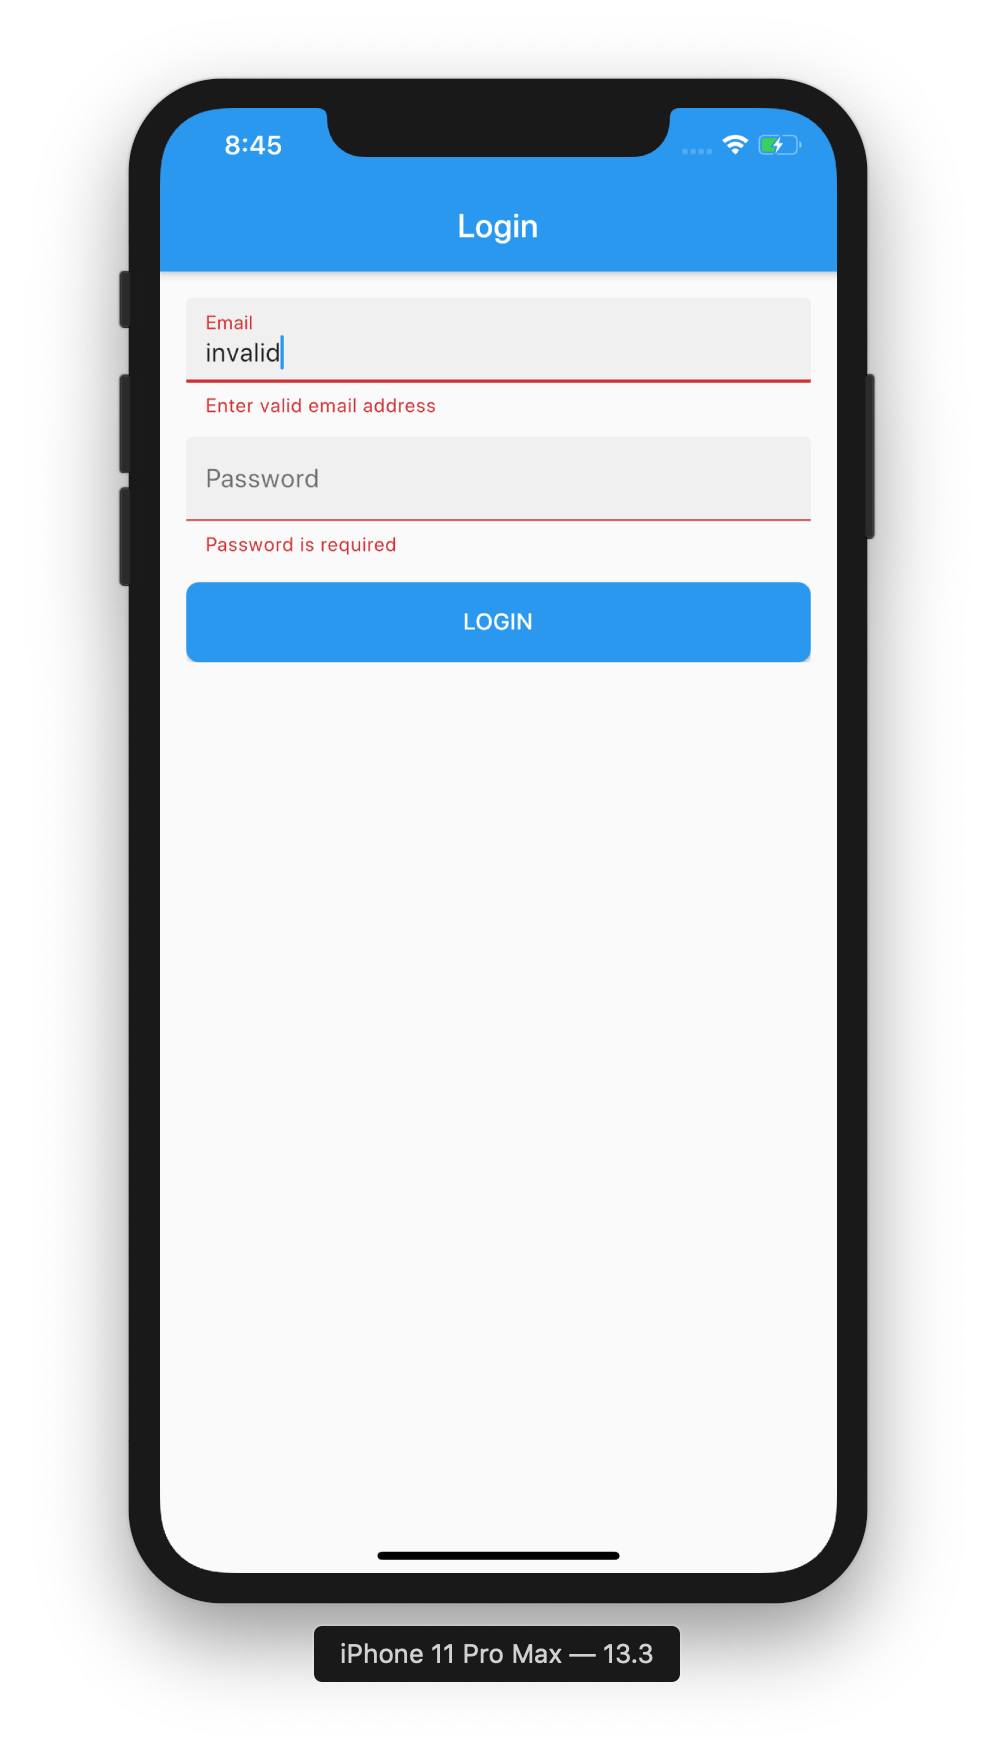
We are done. You can now run your application and see the validation errors that you get when your form is not valid. Your app should look like this:
Conclusion
In thi post we created a simple login form in Flutter and added basic validation. Once again thank you so much for taking time to read.
Comments